SSD7000/6200 Series PerformanceTest Guide (Windows)
- Mar 30
- 3 min read
This knowledge base (KB) applies to the following NVMe RAID AICs.
Table 1: Support NVMe RAID AICs
Support NVMe RAID AICs | SSD7101A-1 SSD7104 SSD7105 SSD7204 SSD7140A SSD7540 SSD7749M SSD7749M2 SSD7749E SSD7505 SSD7202 SSD7502 SSD7120 SSD7180 SSD7184 SSD7580B SSD7580C SSD6204A SSD6202A |
Prerequisites
1. An NVMe SSD must be installed. You must have at least one NVMe SSD installed into the SSD7000 Series RAID controllers.
2. A PCIe 3.0/4.0 slot with x8 or x16 lanes.
1) SSD7100 Series RAID Controllers require a dedicated PCIe 3.0/4.0 x16 slot in order to perform optimally.
2) SSD7200 Series RAID Controllers require a dedicated PCIe 3.0/4.0 x8 slot in order to perform optimally.
3) SSD7500 Series RAID Controllers require a dedicated PCIe 4.0 x16 slot in order to perform optimally.
3. The System CPU. 3.3GHz or better CPU is recommended to get the most out of your NVMe SSD’s.
4. System Power Configuration. This should be set to Ultimate or High-Performance.
5. Make sure any non-HighPoint drivers are uninstalled for any SSD’s hosted by the SSD7000 Series RAID controllers. 3rd party software and manufacturer-provided drivers may prevent the SSD7000 Series RAID Controller from functioning properly.
Steps
1. Download performance testing tool.
We recommend using the IOmeter & CrystalDiskMark benchmark software to test the NVMe RAID array’s performance in a Windows environment.
2. Download IOmeter and CrystalDiskMark.
a. IOmeter:
b. CrystalDiskMark:
3. Check the PCIe Lane assignment.
1) Start the WebGUI management software and click the Physical--Enclosure 1tab.
a. SSD7100 Series RAID Controllers require a dedicated PCIe 3.0 x16 slot in order to perform optimally:

b. SSD7200 Series RAID Controllers require a dedicated PCIe 3.0 x8 slot in order to perform optimally:

c. SSD7500 Series RAID Controllers require a dedicated PCIe 4.0 x16 slot in order to perform optimally:

2) If you are configuring a Cross-Sync RAID array, repeat this procedure for Enclosure 2 to check the PCIe Lane assignment.

4. Configure the RAID Array (e.g. RAID 0)
1) Create a RAID array using the WebGUI or CLI.
WebGUI:
a. To configure the NVMe RAID array, access the WebGUI management software, and click the Logical tab.
b. Click on Create Array and configure the NVMe SSD’s as a RAID 0.

CLI:
a. Enter the following command using Command Prompt to start the CLI: C:\Windows\system32>hptraidconf

b. Enter the following command to check the PCIe Lane assignment:
HPT CLI>create RAID0 disks=* capacity=* init=quickinit bs=512K

2) Access Disk Management, and partition/format the RAID array. Click the array icon and select "New simple volume" to format the array. Once complete, it will be available for use.

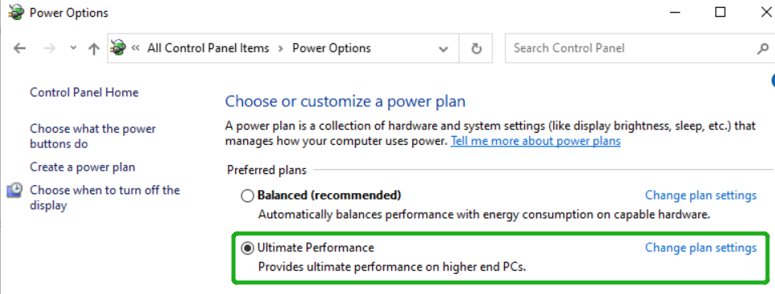
3) Access Power Options under Control Panel > Hardware and Sound > Power Options. Change the power setting to Ultimate Performance or High Performance.
5. Start the Performance Test (e.g. RAID0)
Single CPU performance test-IOmeter:
1) Open IOmeter with administrator rights. Download

2) Click the folder icon to open the script, then select the script to be configured, as shown below:

3) Select 2M-seq-read:

4) The Disk Targets page will change, the Target should be the test disk (the RAID array). The Maximum Disk Size should be set to 16777216 Sectors:

5) Access Specifications will show the configured 2M-SEQ-READ script:

6) Click 2M-SEQ-READ in Global Access Specifications on the right, and click Edit to view detailed information about the script. The screenshot below shows 100% read of 2M:

7) Result Display will be automatically configured as Start of Test;

8) The time set by Test Setup is 60s, and the Queue Depth is 64:

9) After confirming the settings, click the green mark to start the performance test.

Single CPU performance test-CrystalDiskMark:
1) Open CrystalDiskMark with administrator rights.
2) Click Settings.

3) Test Size: set to 8GiB Test Drive: set to the RAID Volume.

4) After confirming the settings, click ALL to start the performance test.

Multi-CPU performance test-IOmeter:
1) Open IOmeter and start a performance test using the CPU assigned to the SSD7000 controller. Let this run in the background.
2) Press Alt + Ctrl + Delete and select Task Manager.
3) Click the Details tab, search for Dynamo.exe. Dynamo is the IOmeter workload. Right click on this entry and select Set Affinity:

4) Affinity in this case, refers to the CPU and CPU threads that correspond with the PCIe slot hosting the SSD7000 Series RAID Controllers. For example, the SSD7101A-1 RAID Controller is assigned to CPU2 X16 SLOT;
Notes:
Node 0 represents CPU1
Node 1 represents CPU2
a. Sequential Performance:
Select 1 thread that corresponds with CPU2, such as CPU 0 (Node 1), shown below:

b. Random Performance:
Select 8 threads that corresponds with CPU2, such as CPU 0 - 7 (Node 1), shown below:

5) After the thread has been specified, return to IOmeter and start a new performance test using the supplied scripts.
Thanks for this detailed guide! How do the speeds compare between SSD7000 and 6200 when running high-demand applications, like Snow Rider?